


*This post was sponsored by Cricut and contains affiliate links. All thoughts and opinions are my own.
One of my big goals this year is to make my family all new blankets. When I first got my sewing machine 15 years ago, I focused almost exclusively on quilts, so my kids all have mum-made baby blankets. Me and my husband still use the first Queen size quilt I ever made for us too. I'm horribly embarrassed by that thing, but my husband loves it and it's still a blanket, soooo.....here we are.
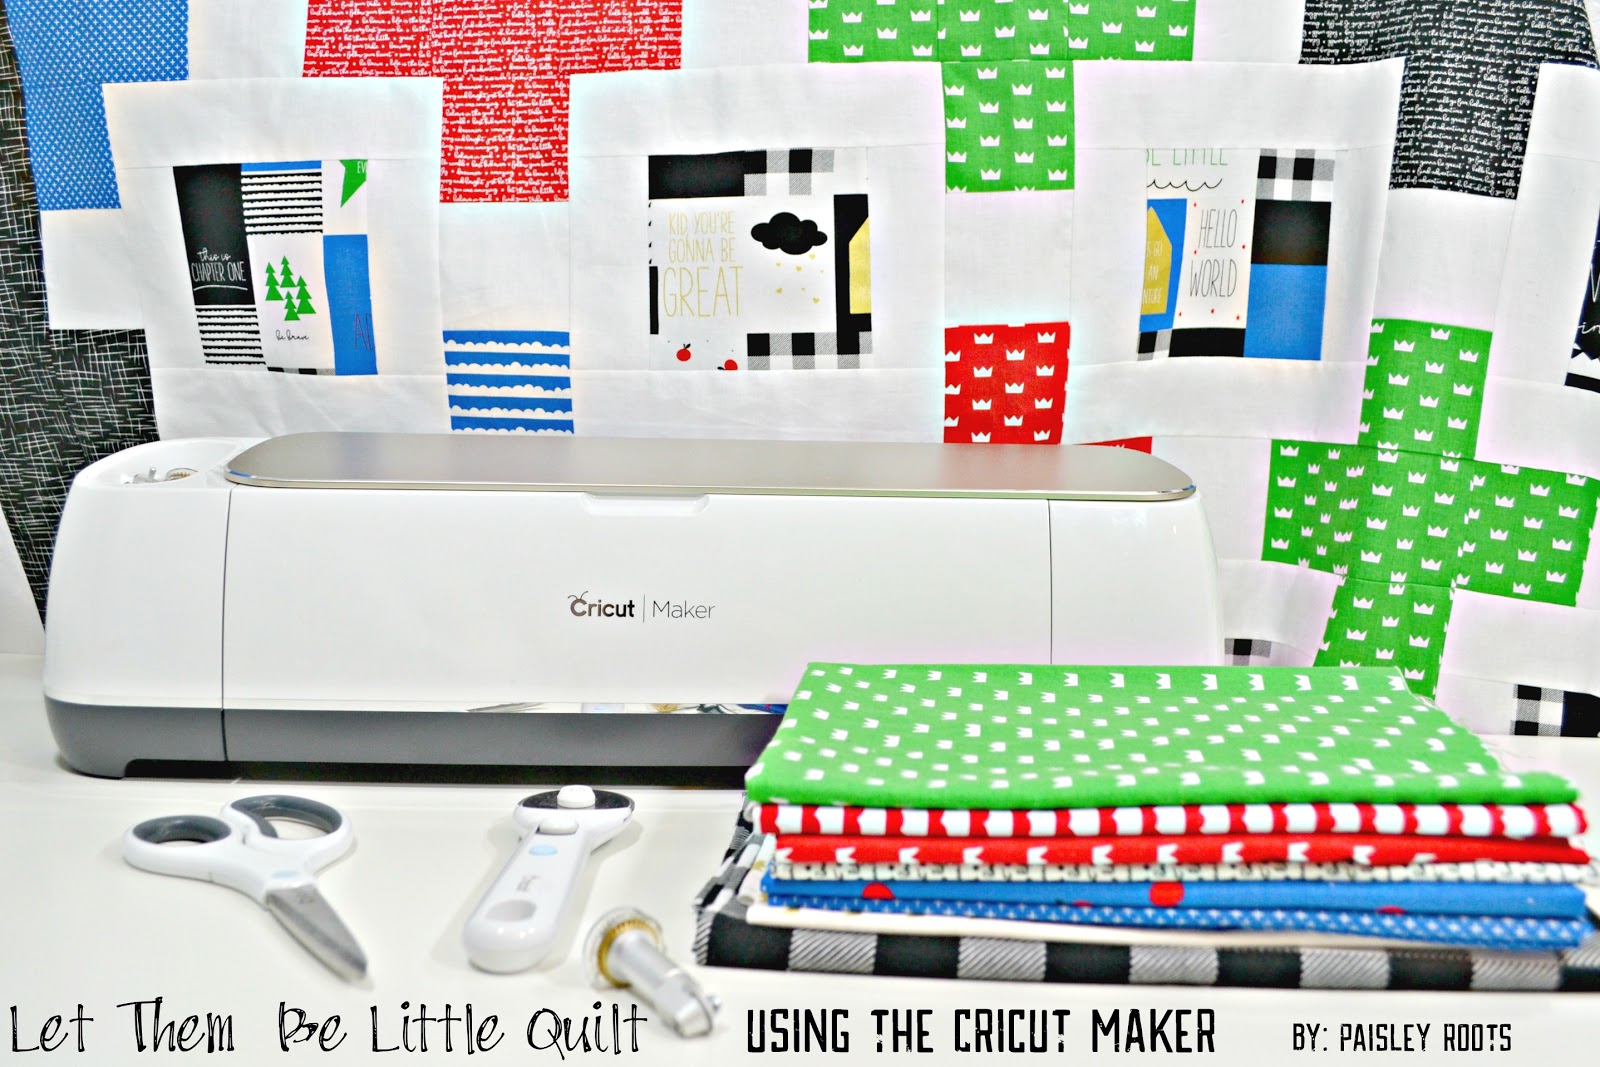
In case I haven't mentioned it already, the Cricut Maker has seriously changed quilt making for me.
I really despise cutting out pieces and for the life of me, I can never get them perfectly right, which makes for some very wonky quilts.
Don't get me wrong, there's a special place in my heart for wonky quilts, but it's really nice to get more precise quilts, if you know what I mean.
So onto this quilt!
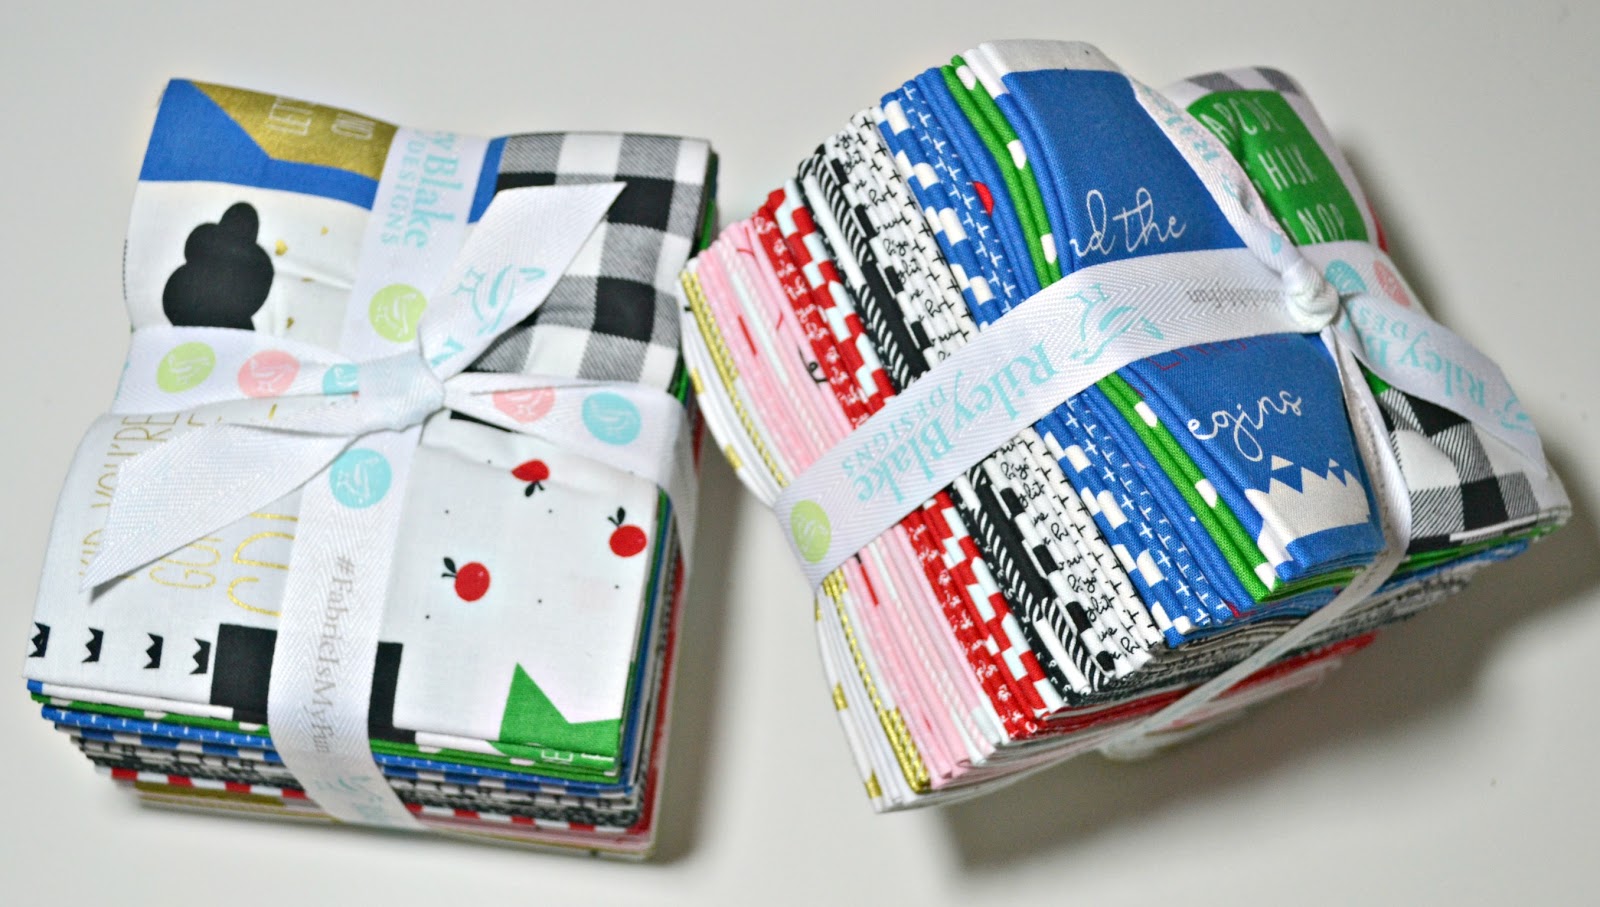
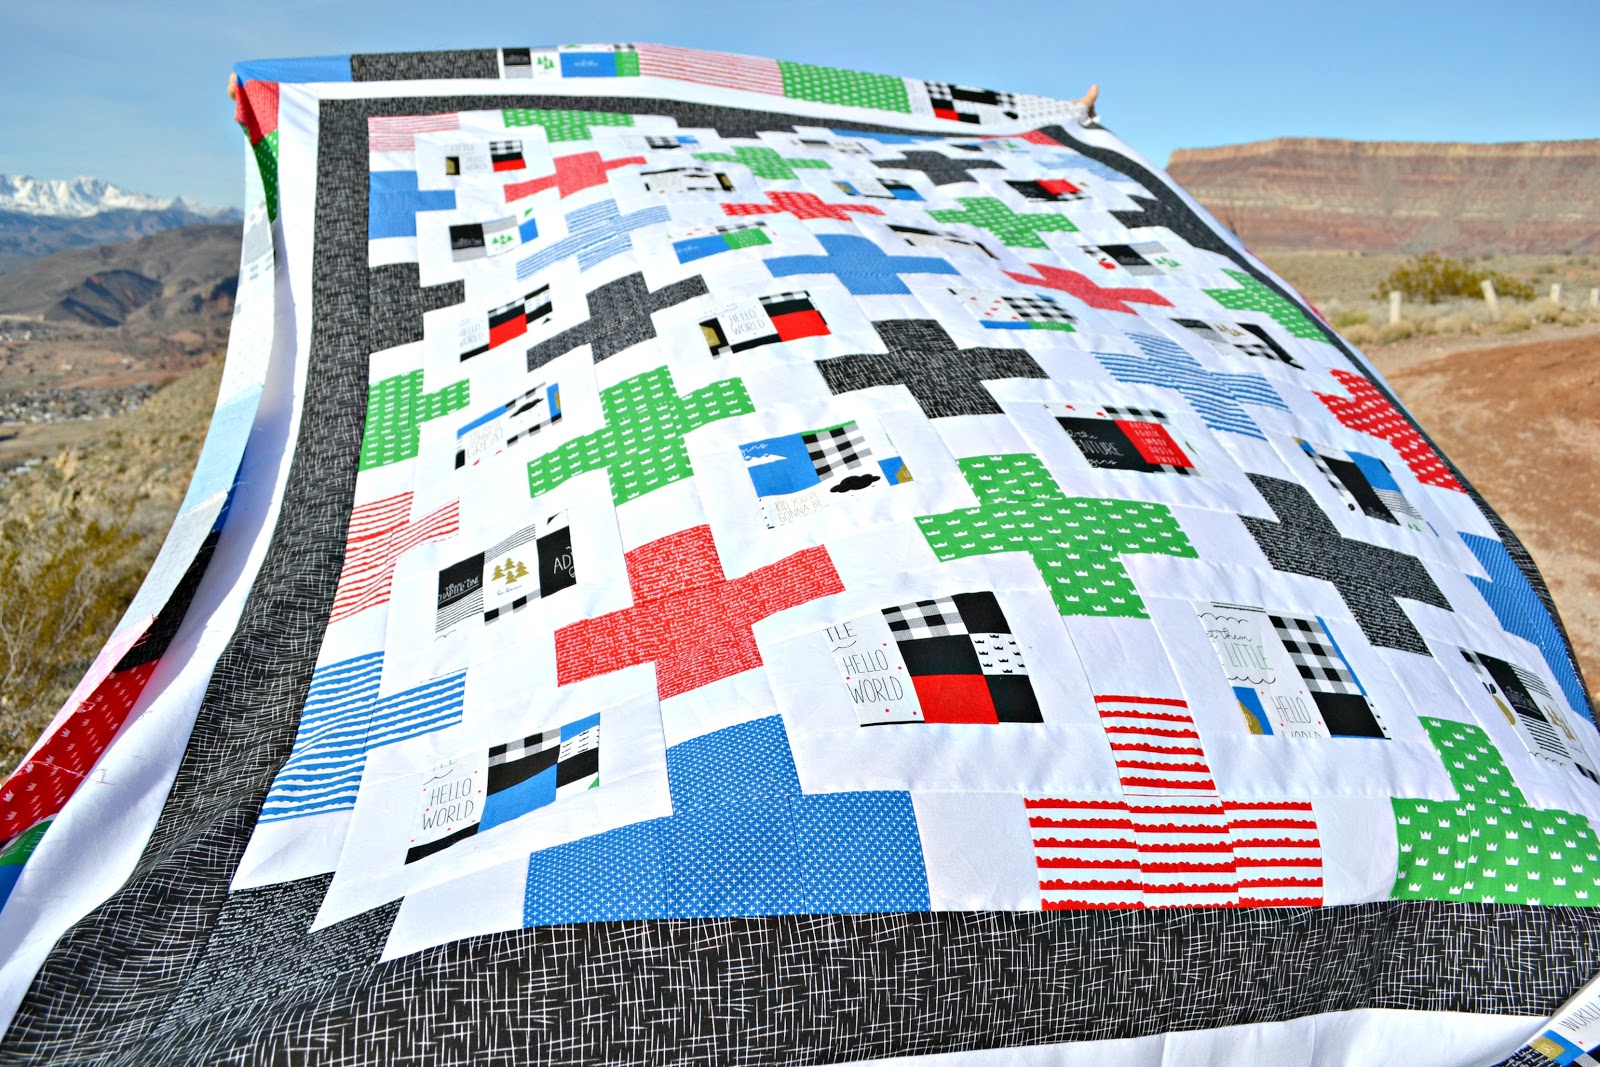
I chose to go with the fabric, Let Them Be Little by Simple Simon & Co. for Riley Blake Designs. My kids are growing so quickly, this line name definitely stabbed me in the heart a bit. I love the colors and think it's so perfect for kids.
I actually got 2 Fat Quarter Bundles and did a little switching fabrics keeping most of the blue, green, red, and black for Judes quilt and I kept most of the pink and gold for Paisleys coordinating quilt that has yet to be made.
To make the Twin Size quilt, I got:
2 2/3 yards White Fabric
2/3 yard coordinate fabric for smaller border
5 yards coordinate for backing (not shown at all in this post.)
Twin Size batting (again not shown in this post.)
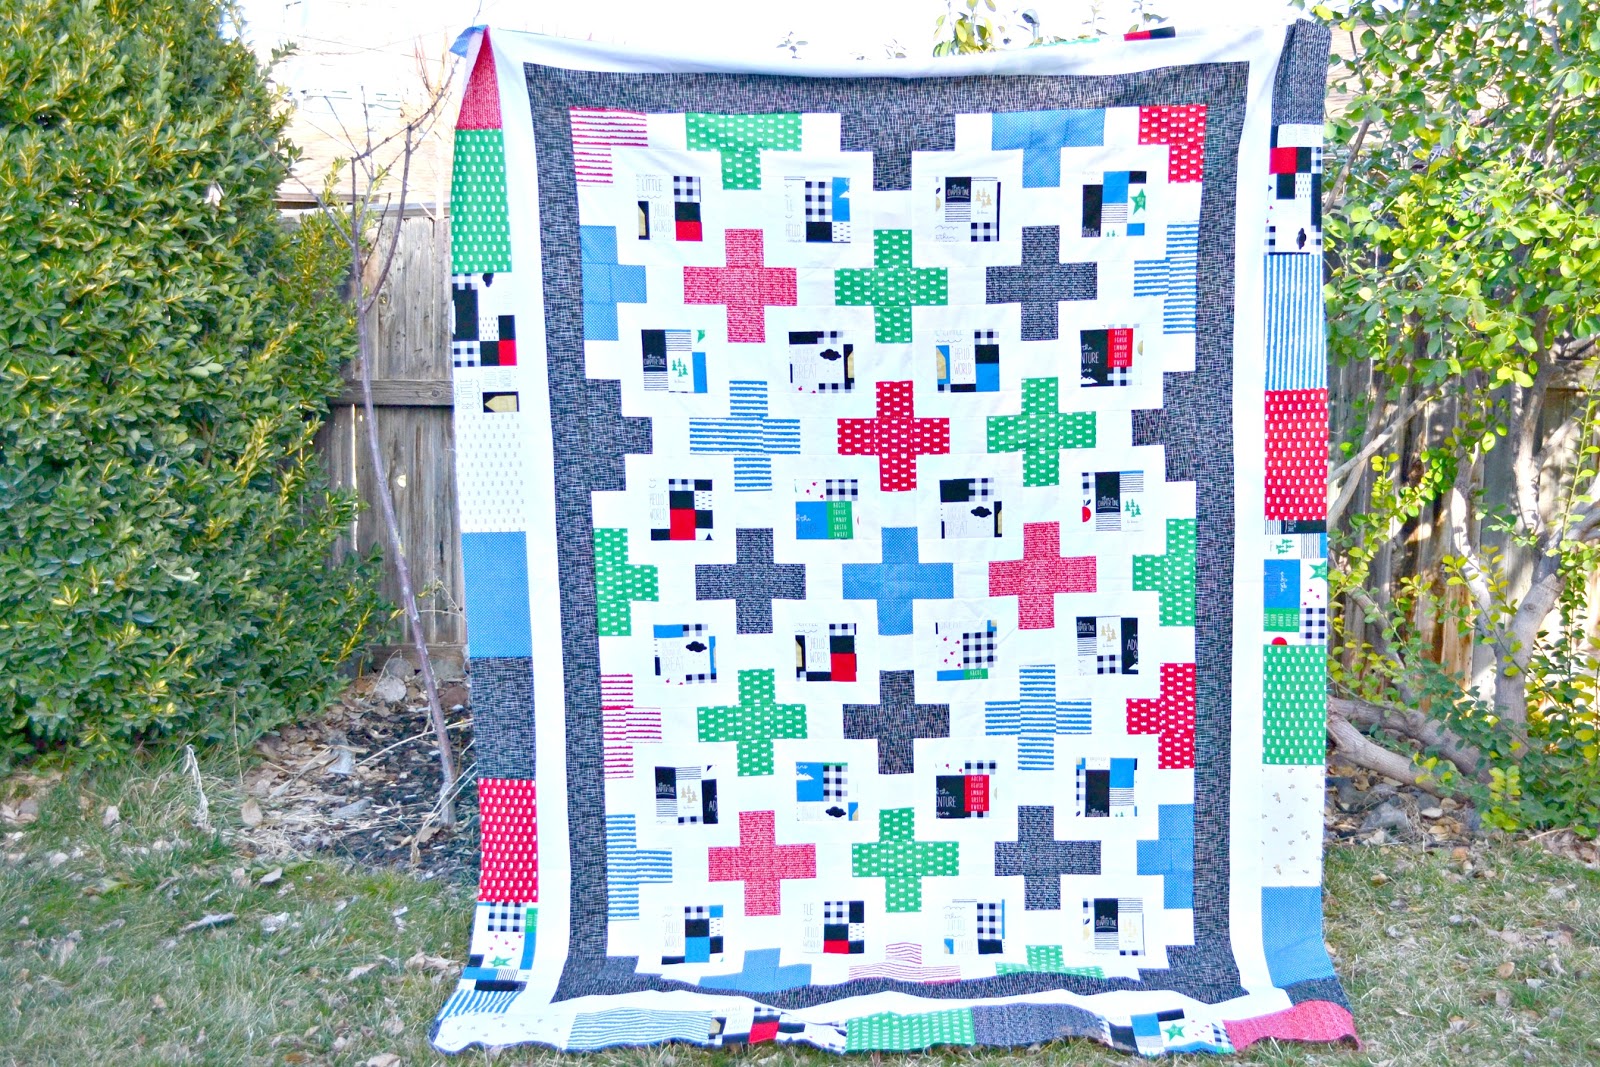
The quilt top is 68" wide by 84" tall.
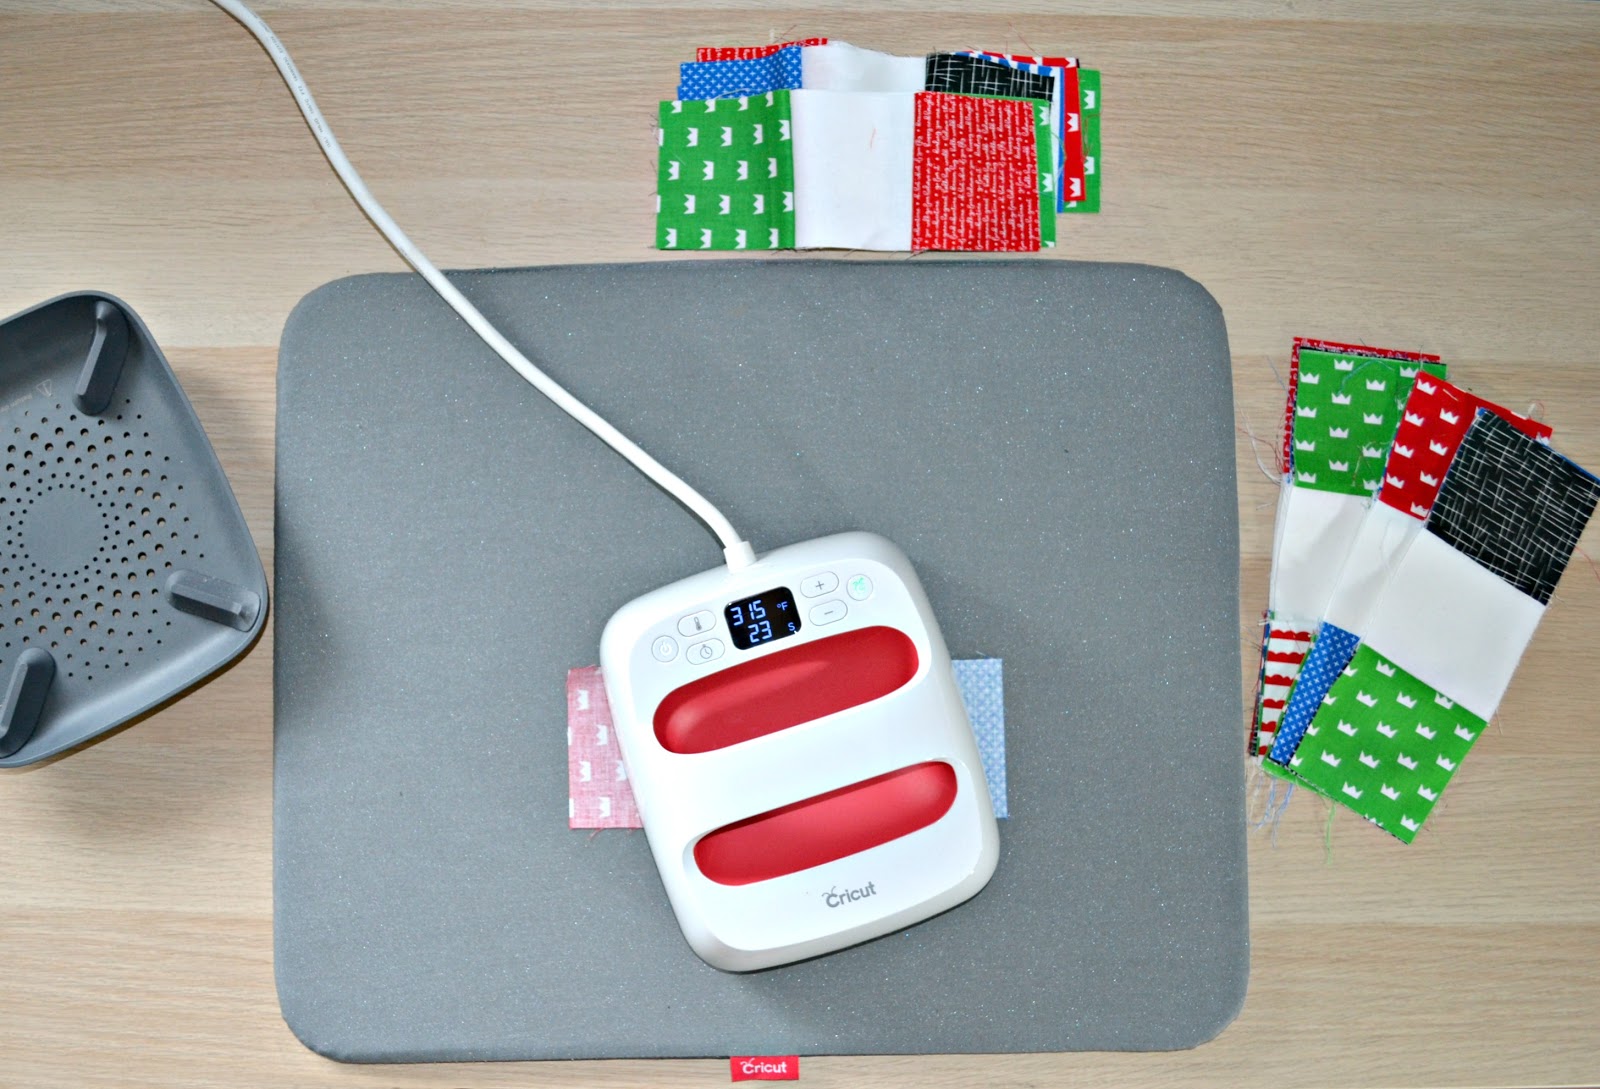
You will also need the Cricut Maker and at least one FabricGrip 12" by 24" Mat.
Other items nice to have are:
You can watch the video for steps or keep reading!
1 - Cut 6 - 12" by WOF from your white fabric - press and set aside.
2 - Choose 14 prints from your Fat Quarter Bundle and cut them into 12" by 22" strips. Set remaining fat quarters aside to turn into bias trim.
3 - Open "projects" in Cricut Design Space and click on ""To A "T" Baby Quilt"".
4 - Start prepping your 12" by 24" Fabric mats with your fabric strips.
5 - Follow the directions in Cricut Design Space.
6 - When you're finished cutting your pieces out, click "finish", then re-hit the "make" button to cut all the pieces out a second time.
7 - Lay your quilt pieces out into the colors you want and start sewing them together. Make sure to trim your pieces along the way to keep the quilt straight.
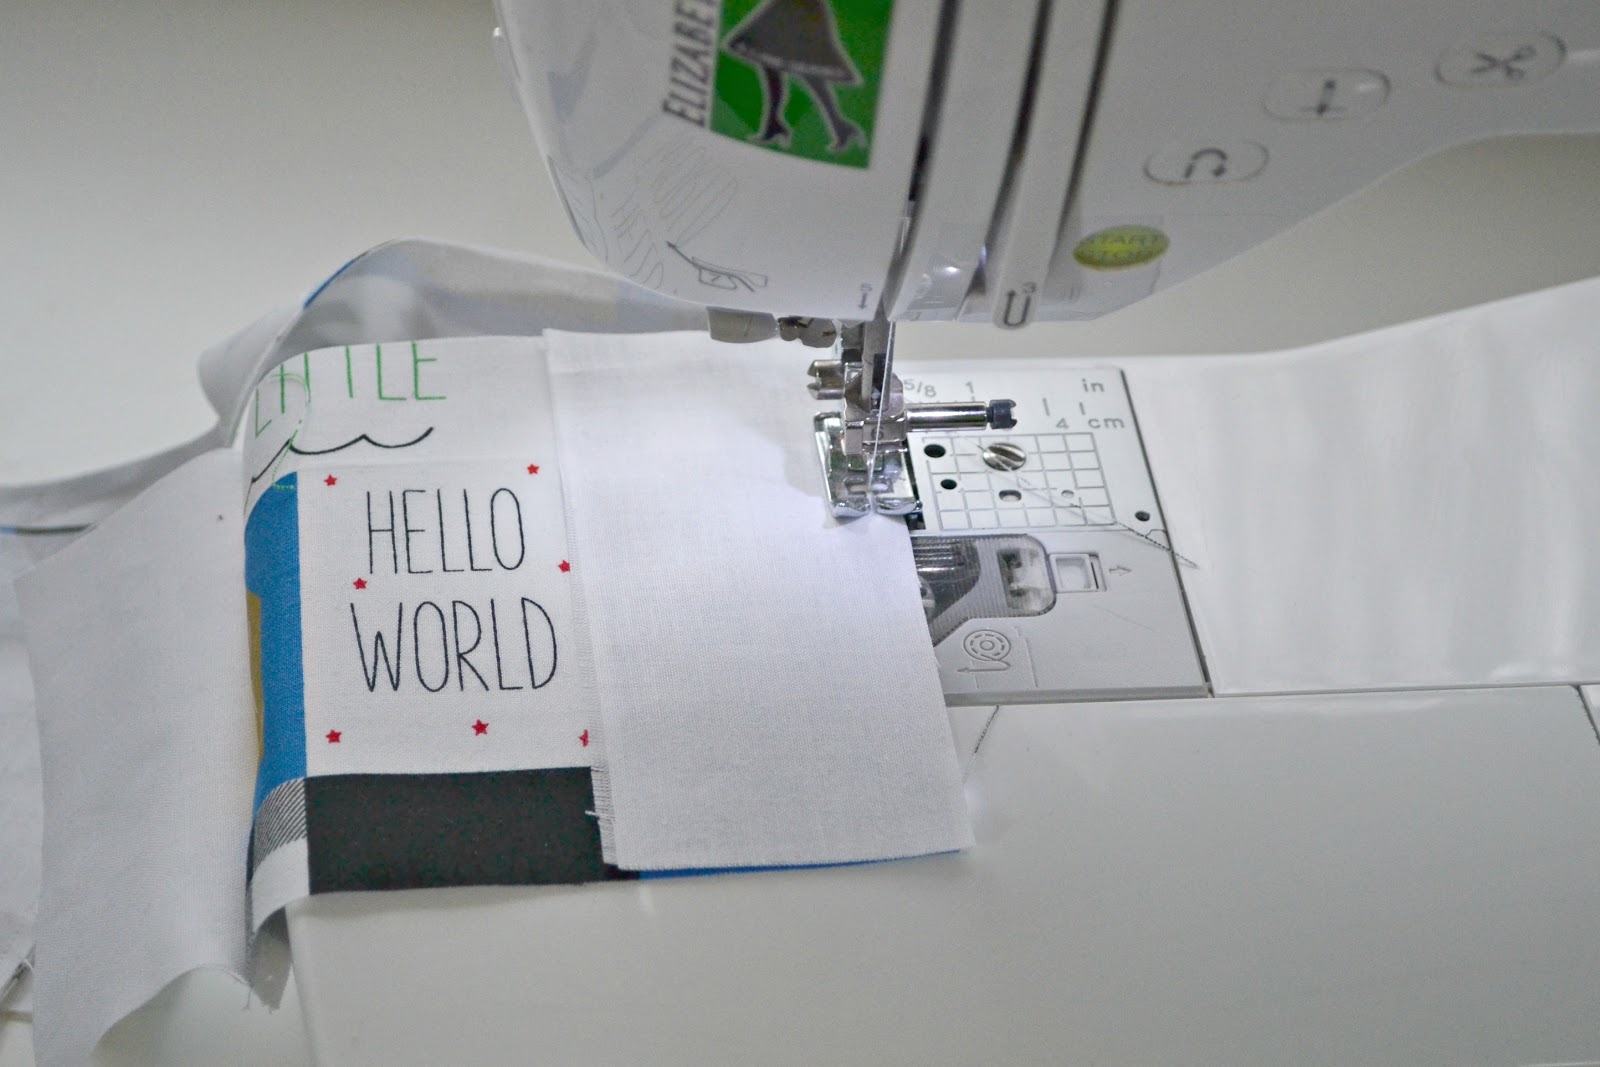
8 - Using the Cricut Easy Press 2 (or your iron!) make sure to really press your fabric every step of the way!
For the border:
Cut 8 strips 3.5" by WOF of coordinating fabric.
Sew 2 strands together diagonally to make 4 strands.
Sew each strip along each edge of your quilt.
Trim ends.
Cut 8 strips 2.5" by WOF of white fabric.
Repeat sewing 2 strands together and sewing each strip along the edges and trimming the ends.

For the last border, take the remaining 14 pieces of your fat quarters. Trim them down to 5.5" wide. Cut each piece in half (roughly making them 5.5" by 10.5")
Make two strands of 9 pieces and two strands of 7 pieces sewn together.
Sew the 9 pieced parts down both sides, and then use the 7 pieced parts for the top and bottom.
Make sure to press each seam and trim as you go!

And you're done with your quilt top!
I took this one to be quilted by an actual long arm quilt and am still waiting to get it back.
I can't wait!
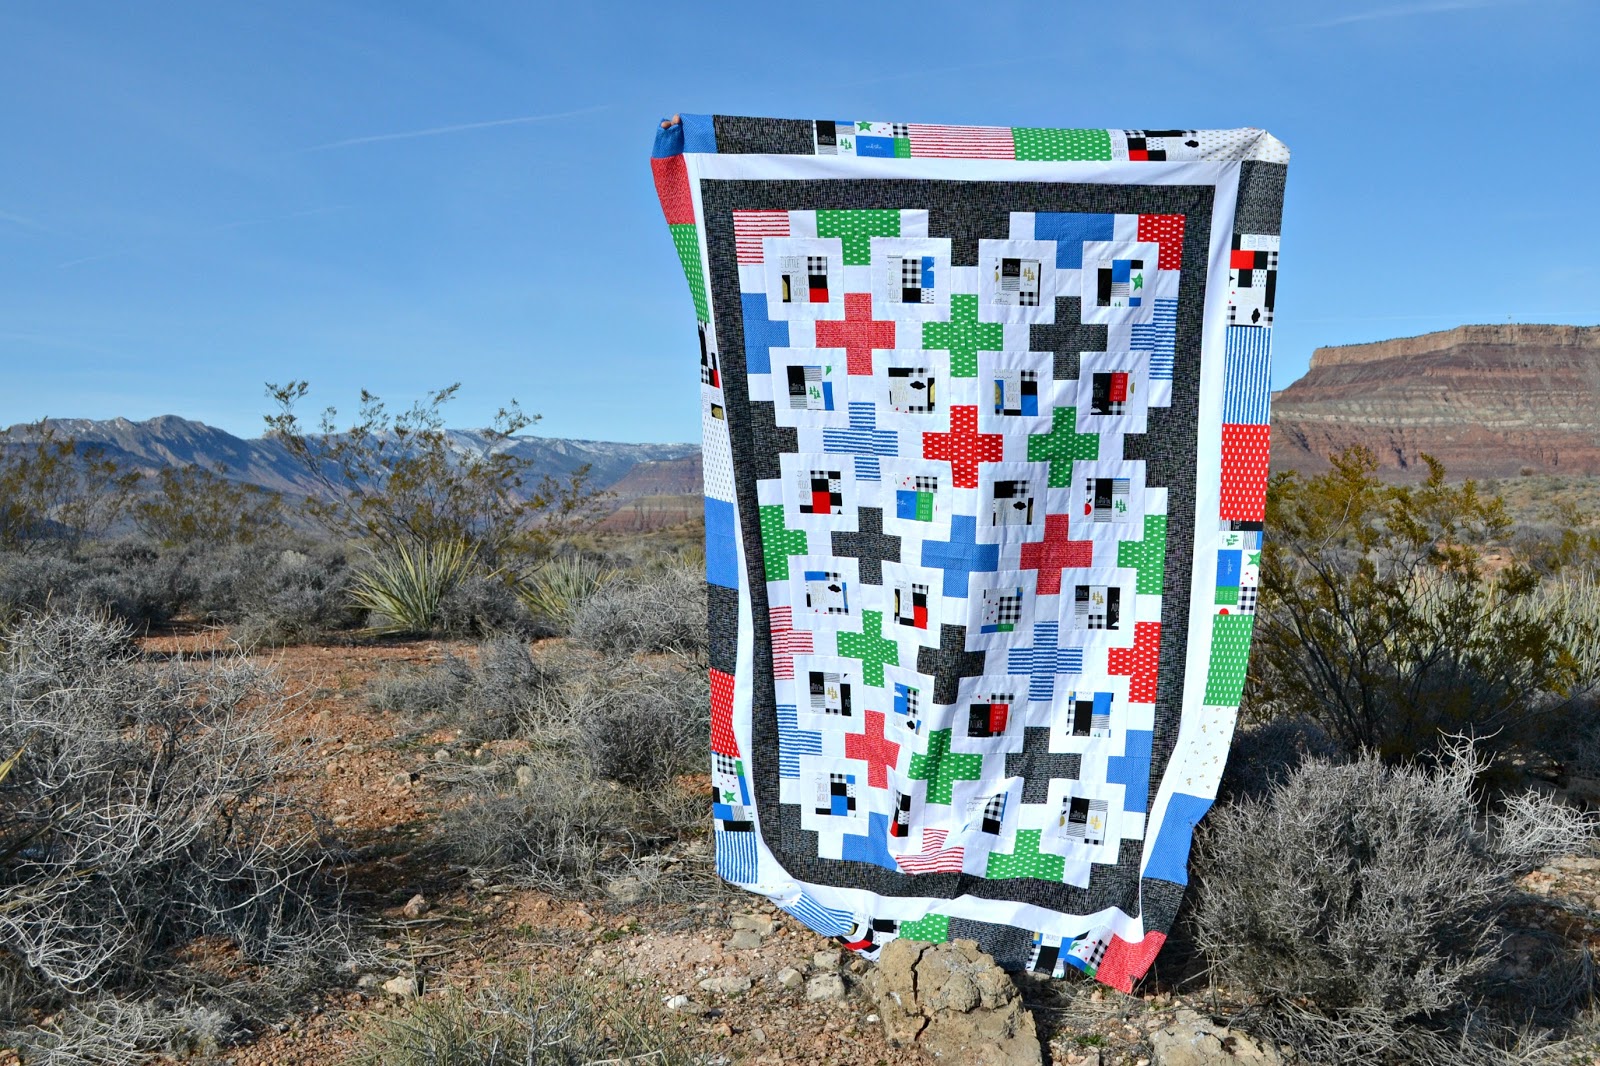
And in case you're wondering, this is quilt #3 for my kids. My goal is rather lofty and I'm hoping to make 2 blankets per kid.
Wish me luck!
This is a sponsored conversation written by me on behalf of Cricut. The opinions and text are all mine.
No comments:
Post a Comment
Shout outs are ALWAYS welcome! I LOVE comments!!